20+ Years Experience
Specialist Wetpour Surfaces
Enquire Today For A Free No Obligation Quote
If you’re looking for an easy, low-maintenance surface that looks great, wetpour surfacing might be the perfect option. Installing it takes some time, so why not make sure you’re getting it just right? We’ve gathered all of the information you need to install wetpour surfacing like a pro in this step-by-step guide. At the end of it, you’ll have a stunning, durable surface that turns your outdoor space into something special.
Wetpour surfacing is best installed by experienced professionals. If you are looking for detailed instructions, there are instructional videos and tutorials available online to help guide you through the process.
When installing wetpour surfacing, proper preparation is essential for ensuring successful, safe, and long-lasting results. Below is a list of items that should be taken care of prior to installing wetpour surfacing:
Underlying Surface: The underlying surface must be properly prepared to ensure that it will provide sufficient support and flexibility for the wet pour rubber. The surface should be free from all debris, dust, and irregularities. It must also be completely level in order to lay the wetpour correctly.
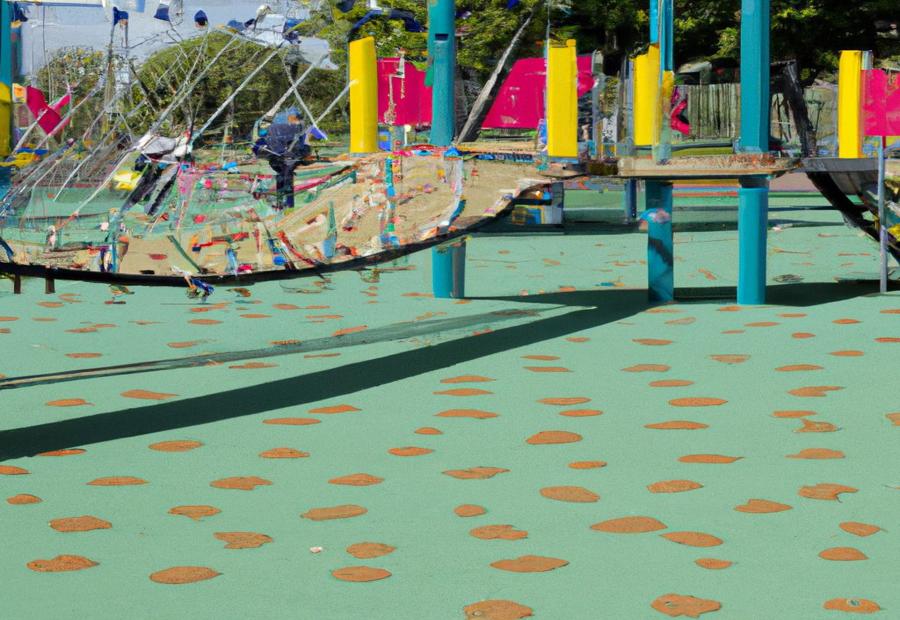
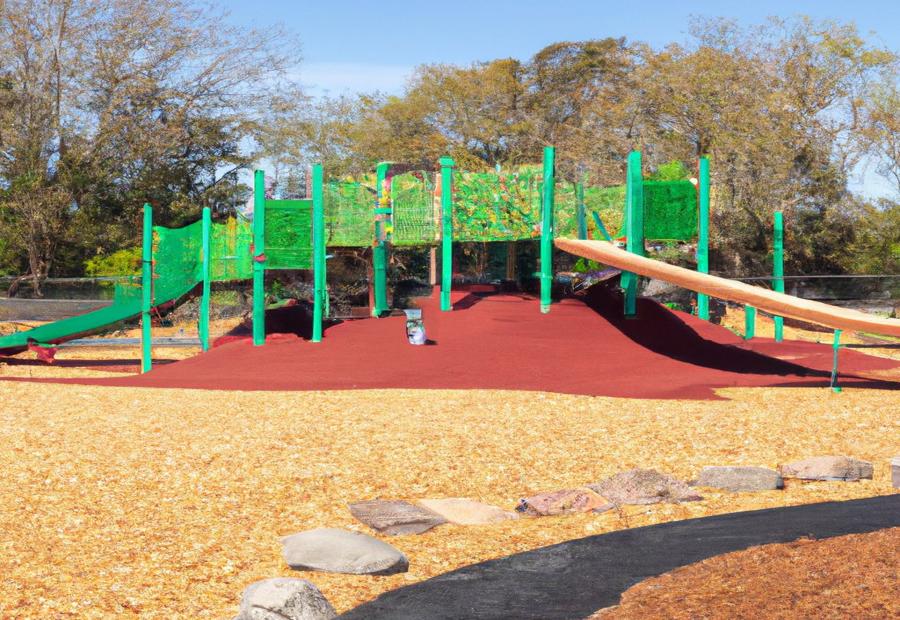
Consider Shock Absorption: Wetpour surfacing typically offers higher shock absorbency than other flooring materials so it is important to consider the degree of shock absorption that you require when selecting your wetpour product. For example, some playgrounds may require more shock absorbency than others in order to protect children playing there from any potential injuries.
Lay Out the Area: You’ll need to identify the exact area where you wish to install your wetpour before beginning work. Make sure to account for any necessary cuts or bends as these can drastically increase the amount of time it takes to install the rubber. Having a detailed plan laid out will also help determine the exact amount of material needed for the job.
Design Considerations: You may also need to consider certain design elements when installing wet pour rubber such as fall zones and play areas. For instance, any area with a slope should be adequately marked so that it is properly filled and covered with rubber. This will help reduce any potential hazards while playing near or on top of the wet pour surface.
These are just some of the more general preparatory considerations when it comes to installing wet pour surfacing; there may also be specific requirements depending on your particular project or location. Careful consideration during this step of the process can help make sure that everything goes smoothly once installation begins.
Now that we have an understanding of the preparation necessary for installing wetpour surfacing, let’s move on to the next step which outlines site preparation for beginning work.
Site Preparation is an integral part of a successful Wetpour surfacing installation project. The surface needs to be both level and clean before any wetpour rubber is laid down and the first step in any process should be to thoroughly prepare the existing site. Use a square and leveller to check that the surface is correctly levelled, while any debris should be cleared away prior to pouring of the wetpour material in order avoid an uneven surface which could cause problems further down the line.
In some cases, it may be necessary to apply a layer of an appropriate shock absorbing underlay. This allows for an increase in impact absorption due to the high footfall on play areas or sports surfaces, reducing injuries and keeping those involved with the area safe. It also provides superior drainage and helps maintain moisture levels within the surface.
Additional surfacing protection layers can also help increase longevity of the wetpour area itself by providing more protection from UV radiation which reduces fading of colourful designs and markings. However, it is important for installers to consider whether these additional layers really are necessary for your particular project taking into consideration factors such as cost, durability and location of the wetpour area.
Now that the site is prepped it’s important to take into account a few safety considerations prior to beginning the installation process. The next section will cover ‘Safety Considerations’.
Safety considerations are an important part of any installation project, and wetpour surfacing is no exception. There are a few safety measures that must be taken into account when installing wetpour surfaces:
1. Proper PPE: When working with wetpour surfacing, it is important to wear the proper personal protective equipment (PPE). This includes items such as protective gloves, goggles, masks or respirators if needed, long sleeves and pants, and any other items needed to keep you safe and protected on the job.
2. Adequate Ventilation: Good air flow is essential during installation projects, as this will help ensure that no vapor or dust particles created during the installation are inhaled by anyone on site. Make sure your work area is well-ventilated and that any potentially hazardous materials are handled with care.
3. Working With Heavy Machinery: If you plan to use any heavy machinery for the installation project, it is important to take safety precautions when operating any type of power tools. Make sure to read all instructions carefully before using any machinery, and always make sure you have the necessary safety gear on hand when doing so.
4. Keeping Workers Safe from Injuries: Wetpour installations can be physically demanding and result in muscle strain over time, so it is important to make sure everyone on the crew takes regular breaks to avoid overexertion. It is also a good idea to set up a designated first aid kit in case of any injuries that may occur while installing wetpour surfaces.
These safety considerations must be taken into account when installing wetpour surfaces in order to ensure that everyone on site remains safe throughout the process. With these precautions in place, you can rest assured knowing that your crew will be able to complete the job without any unnecessary risks or hazards present.
Now that we have discussed safety considerations for wetpour surfacing installation projects, let’s move on to gathering the proper equipment for the task at hand in the next section.
Before beginning a wetpour installation, it is absolutely essential to ensure that you have all the correct equipment. This includes rubber wetpour granules and stones, a rubberised binder solution, a wheeled wheelbarrow with an arrowhead tray, as well as a rake and shovel for spreading and tamping. Other tools such as a hand tamper, wooden mallet, spirit level and measuring tape may also be helpful for ensuring the finished surface is of the highest possible quality.
Having the right tools for the job will make the installation process faster and easier by preventing delays when you don’t have what you need to proceed. It’s best practice to lay out all of your equipment beforehand so you have easy access throughout the process.
Another important factor to consider when preparing your supplies is following health and safety protocols. Be sure to wear a dust mask, gloves and other protective clothing while installing wetpour surfacing. Completing this step before beginning installation will prevent accidents or costly delays due to missing personal protective equipment (PPE).
In addition to gathering the necessary materials and PPE, you may wish to consult professionals or reference documentation on proper wetpour installation procedures. Careful research can help ensure the job is completed efficiently with fewer mistakes or problems.
With all of your items laid out and ready to go, you’re now prepared to begin installing wetpour surfacing! The next step in this guide will discuss the steps involved in the wetpour installation process in more detail.
Wetpour installation is a process that must be done correctly in order to ensure a finished product that is both safe and aesthetically pleasing. The installation process requires careful planning and consideration of the sub base, surface levels, detailing, and weather conditions.
The first step in the wetpour installation process is to prepare the area by cleaning off any existing debris or loose material. This will help create an even surface free from obstacles and possible contaminants. Once this is complete, make sure to inspect the sub base before proceeding to install the wetpour. The sub base should be firm and leveled with no irregularities, as these can cause problems down the line. If necessary, use a compactor for leveling before proceeding further.
Once you have ensured that the area is level and free from contaminants, it is time to lay out the protective membrane. The installation of a protective membrane helps contain any excess liquid materials during the installation process, prevent water drainage issues, and protect against root ingress. Make sure to take your time while laying out the membrane as an unevenly spread sheet can lead to issues later on.
After properly laying out the membrane, begin mixing and pouring the wetpour mix into separate areas that don’t exceed 5m x 5m squared. Starting in one corner move towards the other corner ensuring an even spread of wetpour at each stage of pouring. To avoid creating air pockets when setting, use a professional trowel with careful pressure during spreading of the material for a good finish. Then shake down small marble chips to fill in any stray air pockets found during troweling.
Once all of your wetpour has been poured you’re nearly finished! The final step is to tamp down and compact your wetpour material ensureing it is firmly adhered once it dries and cures completely. Finally, let your wetpour dry overnight before any foot traffic is allowed on it so it has adequate time to set fully in its new place.
Now that you have finished installing your wetpour surface, the next step is to clean up the area before enjoying your completed project. In this section we will discuss how best to clear off debris left over from installtion so that you can start enjoying your freshly installed wetpour surfacing!
When it comes to wetpour surfacing installation, one of the most important steps is cleaning the area. It cannot be overstated how essential it is to ensure the area you plan to install the wetpour surface is immaculate before beginning any other part of the process. Failure to adequately clean the area can lead to unsafe surfaces, potential health hazards, and long-term damage.
To begin, sweep or vacuum the surface, paying close attention to all cracks, holes, and bumps. Next, consider pressure washing the ground – this will help remove any dirt or debris left behind from sweeping. After pressure washing, let it dry thoroughly.
Another important step for ensuring a safe and successful wetpour installation is chemical treatment. Not only does it prepare the ground for wetpour installation by removing any moss or weeds that may have been left behind during preparation but some chemicals also help create a stronger bond between ground and wetpour as well.
On the other hand, there are drawbacks such as risks posed by chemically treated areas, air pollution caused by exhaustive power washing and rinsing, as well as safety issues posed by environmental concerns (including biodegradable chemicals). As such, many companies opt to forego chemical treatments in favor of an organic-based alternative.
In conclusion, proper cleaning of the surface prior to installation of wetpour surfacing is an immensely important component of creating a safe and effective product. Regardless of which method you choose to prepare your surface – chemical treatments or organic alternatives – both need to be done thoroughly with no corners cut in order to achieve ideal results. Now that the area has been cleaned it’s time to move on to pouring the base layer.
Pouring the base layer is an essential first step of installing wetpour surfacing. It is necessary to ensure the surface can withstand foot traffic and other activities. The most important consideration when pouring the base layer is to make sure that it is even and level. This will minimize any potential hazards later on as well as ensuring no weak spots are present.
The process for pouring the base layer requires a few steps. First, a layer of wetpour rubber granules should be applied across the whole area, which will create a uniform foundation for the next step. For additional adhesion and evenness, spray adhesive is then used to secure the granules in place before laying the Fibar® layer of aggregate on top. Once this is done, a roller or compactor must be used to press down and level out the base layer before it is finished with a vacuum blower if desired.
Some argue that this pre-laying process is just as important for allowing water drainage, eliminating mud pockets and avoiding rutting due to water saturation, as it is for providing support and increased safety in playgrounds. Others counter that although having an even surface may help reduce hazards, the key component here lies in laying down enough surface material so there isn’t risk of children sinking into the wetpour material at the playground later on.
In conclusion, pouring a base layer correctly can provide value in more than one way; not only does it ensure an even and predictable surface but also helps provide stability in playgrounds by reducing water saturation and preventing sinkages over time. Now we move on to discuss pouring the safety layer in order to review this crucial piece of establishing a safe playground environment.
Before pouring the safety layer of wetpour surfacing, a user should prepare their surface and apply a base coat. Make sure that the surface you’re working with is smooth, flat and solid. It is important to ensure that no large stones or uneven surfaces are present, as this could negatively affect the quality of your final outcome. A smooth surface will make it much easier to pour and spread the safety layer evenly.
After you have prepped and primed your surface, breaking down any large chunks of rubber and removing any leftover dirt or debris, you can begin to pour the safety layer. Many users will choose to use a wetpour binder, which binds sand and rubber together to form the wetpour safety layer. To start, apply a thin coat of the wetpour binder over the prepared surface. Mix together your sand and rubber to form an even spread before pouring it onto the prepped area. Make sure that you mix in enough binder solution so that the particles don’t separate while they are being poured or spread. This will help create an even spread when applying the safety layer.
Once the sand and rubber mixture is ready, place it on top of the prepared area in small portions. Begin spreading it out evenly with a shovel until it has achieved your desired depth and area coverage. The depth you want depends on your application but usually ranges from 25-50mm. The sand and rubber mixture will quickly disperse over the area due to its weight and consistency, leading to an even distribution as it self-levels once laid down. After completing this stage of installation, allow for at least 24 hours for drying. Once dry, your surface is now safe for use and ready for further layers of wetpour surfacing if needed.
Now that we have poured our safety layer of wetpour surfacing, we are ready for our next step; wetpour curing. During this step in the guide, we will discuss how to properly cure your newly laid wetpour surface in order to make sure it’s optimized for use.
When pouring a wetpour safety layer, it is important to prepare the surface by making sure that it is smooth, flat and solid. The wetpour should be applied in thin layers with enough binder solution so that the particles don’t separate. Spread out the mixture evenly with a shovel until desired depth and area coverage is reached, then allow for at least 24 hours for drying. After applying and curing the wetpour surfacing, it will be ready for use or further layers of wetpour surfacing if needed.
When it comes to wetpour installation, the curing process is one of the most important steps. Wetpour surfacing must be properly cured to ensure that it remains durable and long-lasting. While some contractors may choose to ignore this step altogether, it is important that you allow your new wetpour surface sufficient time to cure.
Wetpour curing typically involves covering the wetpour surface with a layer of tarpaulins or blankets. This helps lock in moisture and allows the material to reach its full strength. Most contractors recommend that between two and three days should be allowed for the wetpour to completely cure.
During this period, it is important that wetpour surfaces are kept covered at all times. This will help protect against extreme temperatures and prevent the sun from drying out the material before it has had sufficient time to cure. It is also important to note that if rainfall occurs during the curing process, additional blankets should be used to cover the surface in order to keep any standing water contained within the surface area.
On the other hand, some experts suggest a more relaxed approach when it comes to wetpour curing. They recommend that a minimum of two days be allowed for curing purposes but accept that prolonged intervals can cause no harm as it gives added protection against brisk weather conditions, especially during winter months.
Given these different approaches to wetpour curing, there is no definitive answer as to how long wetpour will take to cure but most experts agree that a minimum of two days should always be allowed for best possible results in terms of durability and longevity.
Now that we have discussed the importance of wetpour curing, let’s move on in our step-by-step guide towards learning about what additional materials may be required for complete installation of a wetpour surface.
When creating a wetpour surface, it is important to be aware of the different materials required and how they can best be used. The main material required for installation is wet pour rubber, but in addition to this there are a number of additional materials which may be useful when laying down the wetpour surface. These materials include:
Underlay Pad: Underlay pad is essential for providing an additional layer of protection between the sub base and wetpour rubber. It helps reduce slipping, prevents wear and tear on the wetpour surface, improves drainage and ensures that your wetpour lasts longer.
Blind-Cool: Blind-cool is an aggregate made from a combination of fine river stones mixed with latex resin binder. This product not only helps in providing extra cushioning but also improves the durability of the area as it absorbs impact shocks and helps protect against wear-and-tear.
Edge Trim: Edge trim serves as a perimeter barrier between the wetpour surface and adjacent areas such as pathways and gardens. This product comes in various sizes, shapes and colors and can provide the perfect finishing touch to any wetpour installation.
Surface Coating: Surface coatings provide added protection against UV light and everyday wear-and-tear, ensuring that your wetpour remains looking good for years to come.
These are just some of the additional materials which may be used when installing a wetpour surface. There are a variety of options available, so it’s important to consider all your needs before making a decision on which products will best suit your project.
When deciding on which products to use for your wetpour installation, it is important to weigh up both cost and performance benefits. While some materials may offer greater durability or protection than others, they may also come at a greater cost to you. Ultimately, it’s important to find a balance between budget and quality requirements before making any decisions about additional materials for your wetpour surface installation.
Now that we’ve discussed some additional materials required for wet pour installations let’s move onto the next step – installing your wet pour with drainage functionality in the following section…
Installing wetpour surfacing with drainage is the ideal solution for any playground, providing an even and efficient method of creating a balanced system for surface water draining. The drainage helps in keeping the surface even and ensures that water seeps away from the playground instead of pooling up or becoming a breeding ground for insects. This type of surfacing can be installed as a single layer or as part of an overall wetpour installation, but either way, it’s essential to plan it correctly to ensure drainage effectiveness.
There are two main ways that wetpour surfacing can be installed with drainage: by using a weep hole system or by connecting all layers together and utilising the interlayering system.
The weep hole system involves installing small spreadings of holes across the entire wetpour surface at intervals between 250 – 500mm apart. These provide points where excess water can escape off the playground floor and flow away into an existing collecting system nearby. This is considered one of the most effective forms of installation as there’s no need to connect multiple layers together and thus leaves a cleaner, more evenly spreaded wetpour surface with less obstruction around it.
However, when opting for this method it’s essential to take into account what kind of material you are placing over the wetpour such as sand, woodchips or something else entirely, to make sure that any materials won’t block off or cause damage to the weep holes themselves.
Alternatively, for more complex installations the interlayering method can be used. This involves creating a mini soil platform which firstly provides a clear path for excess water to travel down before reaching any internal pipework. Various levels can be built up or down depending on what kind of usage or design needs to be met with each layer having its own level of drainage passages underneath them to insure no water gathers in pockets throughout the playspace.
Whichever method is decided upon will depend on various factors including size, complexity and type of wet pour material being used, however both approaches are completely viable and should always be weighed up carefully before making a decision.
Conclusion: Installing wetpour surfacing with appropriate drainage is essential for long-term performance and maintenance purposes. In this article we’ve discussed both types of methods involved in making sure precipitation flows away from your playground in order to prevent pooling and insect infestations, leaving you with an evenly draining wetpour surface that meets your individual preference and geographical requirements. In our next section we’ll discuss how these two systems come together in order discern how best they might fit within your particular project’s parameters.
The installation of a wetpour surfacing system requires careful preparation and expert knowledge, but it can create a safe and durable playground or sports surface that will last for many years. It is important to remember to add a shock pad underneath the wetpour for added safety, as well as to consider any potential drainage issues prior to installation.
Given the potential complexity of the installation process, it may be worthwhile to consult with an experienced installer. Professionals can draw up detailed plans, coordinate with contractors and electricians, and provide a guarantee of quality workmanship. The cost associated with a professional installation may be justified by the peace of mind it provides.
On the other hand, many people opt for a DIY installation of wetpour surfacing. It is essential to carefully research every aspect of the project before beginning, and it may be beneficial to enlist assistance from family or friends as needed. Time must also be taken to properly ensure that each step has been completed without compromising safety or durability. With an appropriate level of care and attention, it is possible to install a wetpour system without the help of professionals.
Overall, installing wetpour surfacing requires both skill and experience in order to obtain satisfactory results. Careful consideration should be given to all aspects of the project in order to ensure a safe and successful outcome. Professional consultation can save valuable time and may even potentially reduce costs when weighed against DIY considerations such as obtaining expensive machinery or incurring costly mistakes due to inexperience. In either case, the investment in time and effort that goes into creating a quality wetpour structure is sure to yield many years of use by children and adults alike.
Yes, there are some special tools required for the installation of wetpour surfacing. These include a heavy duty mixer and paddle to mix the rubber granules and resins, as well as trowels, knives and other tools to spread, shape and level the surface. Additionally, a power washer, pressure cleaner or steam cleaner may be needed to clean and prepare the area prior to installation. Other specialty tools depending on the type of surface being installed may include a saw or miter box to cut shapes out of the wetpour surfacing material, as well as spikes and nail guns for attaching edging.
The time frame for the installation of wetpour surfacing can vary depending on a number of factors, such as the size of the area being covered, the type of substrate being used, and any bespoke details that may be added. On average, however, it usually takes around 1-2 days to complete an installation. This includes removing existing surfaces and preparing the base layer, prepping the dry materials, establishing falls, cutting and shaping wetpour rubber pieces, and gluing all components down with a resin adhesive. The curing process takes anywhere from 2 to 4 hours depending on the temperature and conditions. Once this is done, all that remains is to scatter surface aggregates for an attractive finish and you’re done!
Installing wetpour surfacing requires a selection of materials to complete the process correctly. These include:
– Sub-base material: This is used to create an even, stable foundation for the wetpour surface. A suitable type of sub-base could be a mix of crushed stones and sand.
– Geotextile membrane: This helps to protect the underside of the wetpour from any contaminants such as weeds, roots or other objects that can damage the surface.
– Resin bound aggregate: This is what creates the damp, spongy effect of the wetpour surface itself. Make sure this is specifically designed for use with wet pour products as any other type will not be able to absorb and hold moisture.
– Edging strips: These are used to provide the edges of your wetpour with a neat, tidy finish. It’s important to use edging that has been designed specifically for wetpour in order to ensure it remains secure and doesn’t crack or wear away easily.
– Trowelable binder: This is applied over the top of the resin bound aggregate and acts as a layer of adhesive, creating a strong bond between the base and aggregate layers while allowing some flexibility in the surface.


We Aim To Reply To All Enquiries With-in 24-Hours